Monetization options let you customize everything that you need to earn from your Tutor LMS site. Below you will find the settings that you need to customize to maximize your earning potential.
Options #
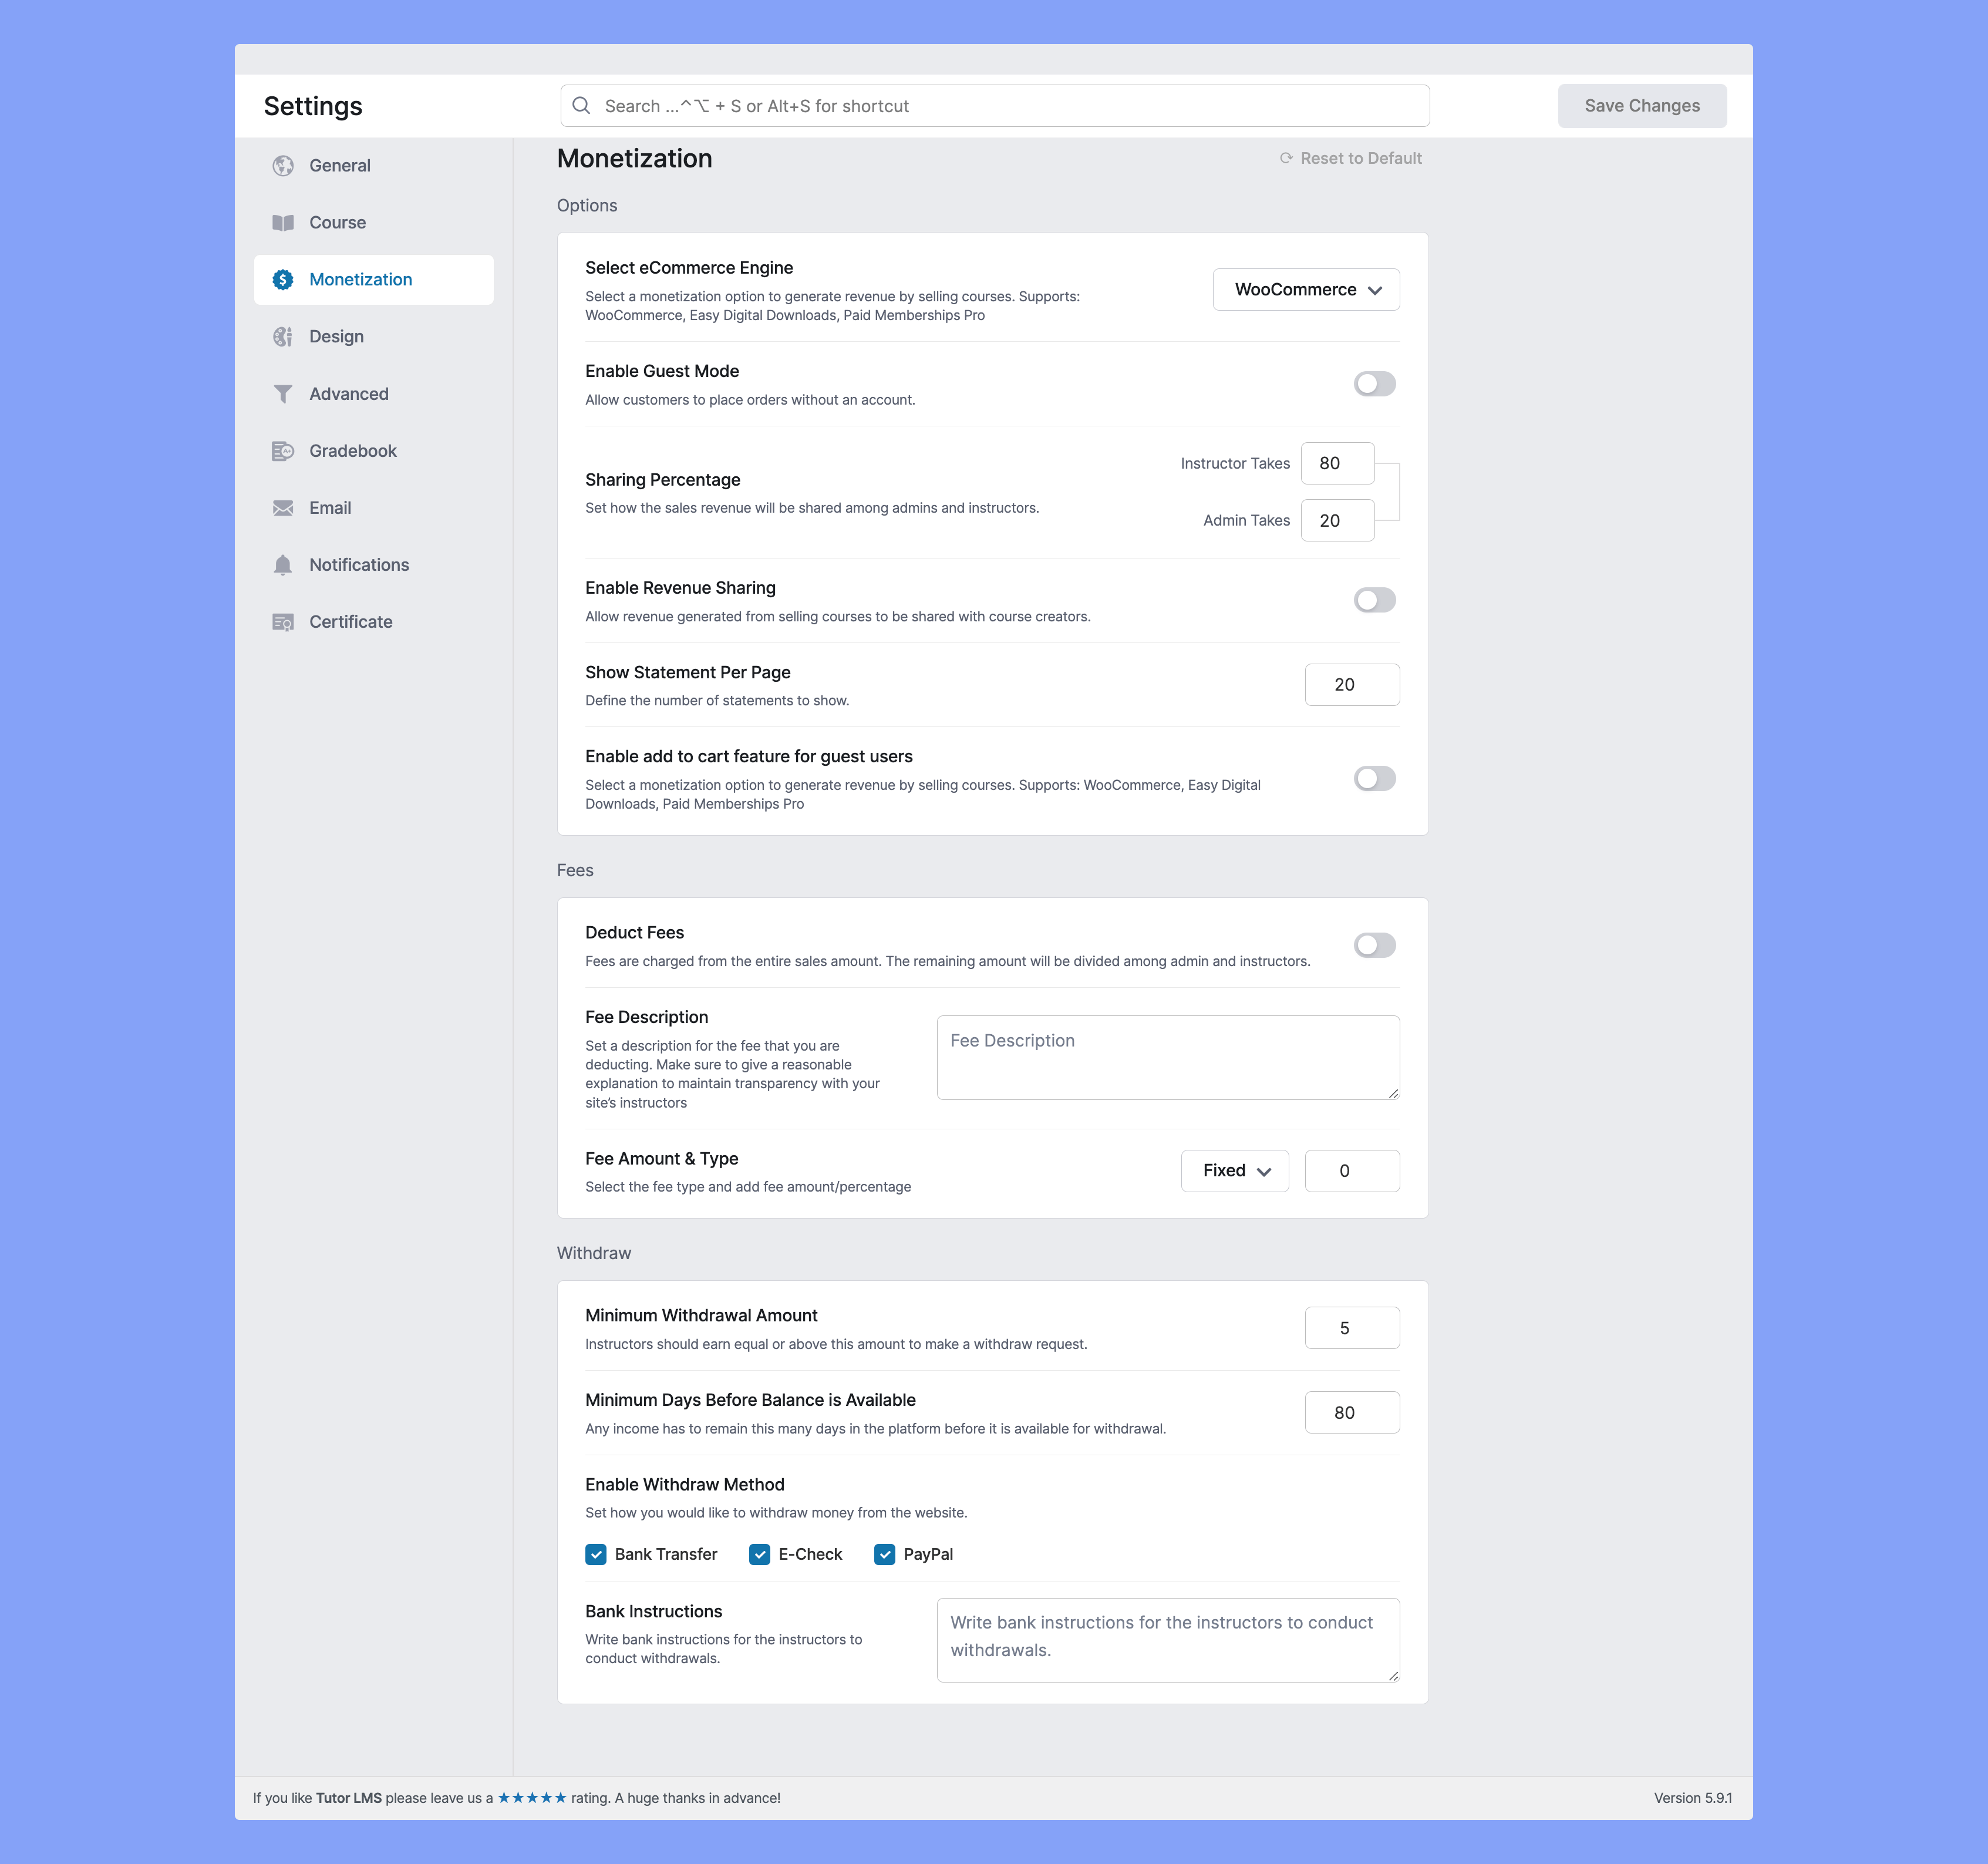
Select eCommerce Engine: Select a monetization option to generate revenue by selling courses. Supports: WooCommerce.
Enable Guest Mode: Allow customers to place orders without an account.
Sharing Percentage: Select a monetization option to generate revenue by selling courses. Supports: WooCommerce.
Enable Revenue Sharing: Allow sharing revenue generated from courses with course creators.
Show Statement Per Page: Define the number of statements to show.
Fees #
Deduct Fees: Fees are charged from the entire sales amount. The remaining amount will be divided among admin and instructors.
Fee Description: Set a description for the fee that you are deducting. Make sure to give a reasonable explanation to maintain transparency with your site’s instructors.
Fee Amount & Type: Select the fee type and add fee amount/percentage. You can either set a fixed amount or set a percentage that will go to the instructor.
Withdraw #
Minimum Withdrawal Amount: Instructors should earn equal or above this amount to make a withdrawal request. Set the minimum amount that they will be able to withdraw.
Minimum Days for Balance to be Available: Any income has to stay this amount of days in the platform before it is available for withdrawal.
Enable Withdraw Method: Set how you would like to withdraw money from the website.
Bank Instructions: Allow getting bank instructions to conduct the withdrawal.
WooCommerce Settings #
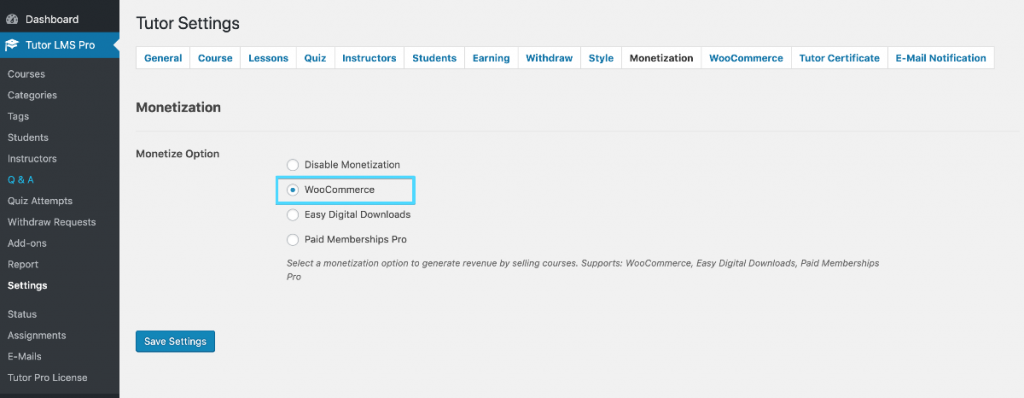
To use WooCommerce as your eCommerce platform, you need to enable WooCommerce from
Dashboard > Tutor LMS > Settings > Monetization (Tab) > (select) WooCommerce.

When WooCommerce is enabled, the following section will appear on the Course creation page.

Here’s how the system works, first you need to create a product with WooCommerce, set the price (regular or sale), and then publish it. Once an item is created, you can then link that product to a course and the course will be sold via that product.
Let’s see the entire process with an example. First, we need to create a product that will be used to sell a course, let’s say the course is “Introduction to Photography”.
Now we need to create a product. So, browse to Dashboard > Products > Add New. Let’s use the same name as our course title so that we can keep track easily. While creating a product, we need to pay attention to the following features:
- Product Type – Simple Product
- Virtual – Enabled
- For Tutor – Enabled
- Price – Set a price

When everything is set, we can now publish the course. Lets head over to the “Introduction to Photography” course. It’s time to assign the newly created product to our course. Navigate to the Add Product section and choose the desired product from the dropdown list. Finally, click Update (or Publish, if you’re creating the course from scratch).

Our job is done here. Now anyone would be able to add this course to the cart or to the wishlist and buy the course anytime they want.
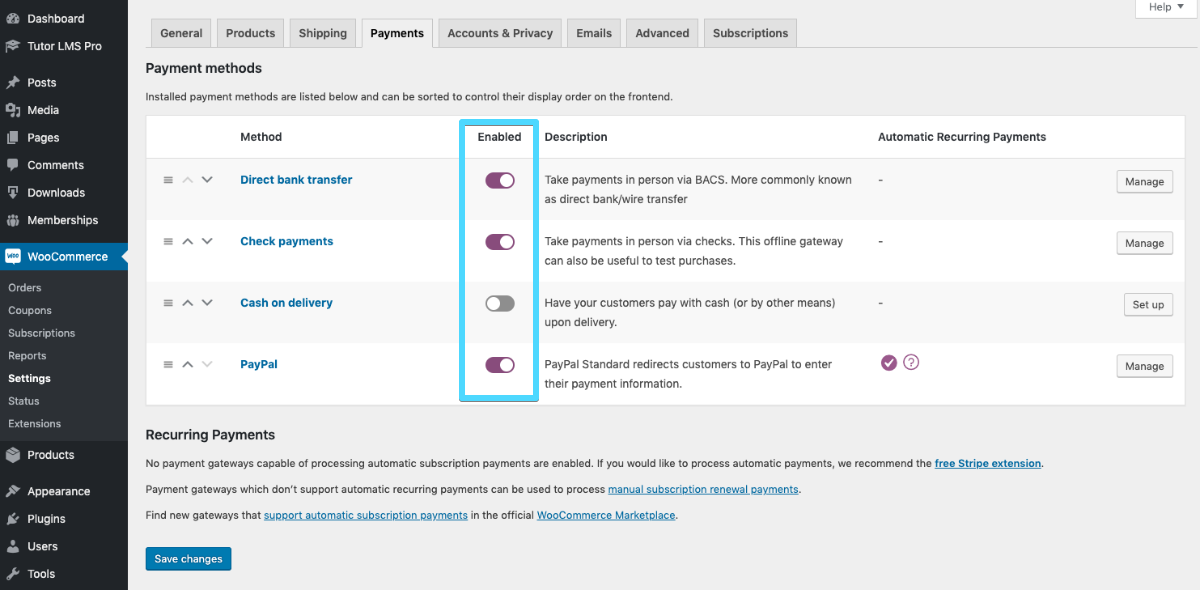
When everything is all set, the final step in this process is setting up your payment method. You can find the WooCommerce payment settings option from Dashboard > WooCommerce > Settings > Payments (tab). Then configure your preferred payment method.

No transaction can or will take place unless the payment method is configured. Meaning if you don’t configure payment method you cannot sell any course with Tutor LMS.


